When evaluating the performance of your digital marketing efforts, using a defined set of IP filters in Google Analytics 4 will prevent you and your staff from skewing the data and keep your reporting accurate.
When recording data from your website in Google Analytics, it should always be as accurate as possible. One detail that is often overlooked during setup is IP filters. These are fairly straightforward to set up in Universal Analytics, but setting up an IP filter in GA4 is a bit more involved.
What is an IP Filter in Google Analytics?
Whenever a visitor arrives at your website they will visit from a specific IP address on the internet. To protect visitor privacy and to adhere to data protection laws, this data is automatically anonymised before being processed or stored, however all traffic will still arrive from a specific IP address.
IP Anonymisation is automatically enabled in Google Analytics 4 as part of Google’s effort to protect user data.
IP filters can be applied to your GA4 property to automatically remove a specific set of traffic from your reports, removing all GA4 events from being recorded from specific (or collection of) IP addresses.
When should I use an IP filter in Google Analytics 4?
There are a couple of scenarios where you may wish to use an IP filter in GA4. In the majority of circumstances, recording every bit of data is important for the accuracy of your reporting. However there are situations where recording particular data can result in non-realistic results.
The main scenario is to prevent the interactions of your own employees being recorded on the site. They may use the site for a number of reasons:
- Testing new site features and changes
- Performing regular maintenance on the website
- Implementing data tracking behind the scenes
- Updating page content on the website
This is not an exhaustive list, but there are a variety of reasons employees and staff may be using the website. The important point to consider is that when using your website they are not realistic site visitors. The actions of your employees may be reflected in reports as showing pages performing very well or very poorly, when in fact that data is not accurate as far as a genuine visitor is concerned.
How do I create an IP filter in Google Analytics 4?
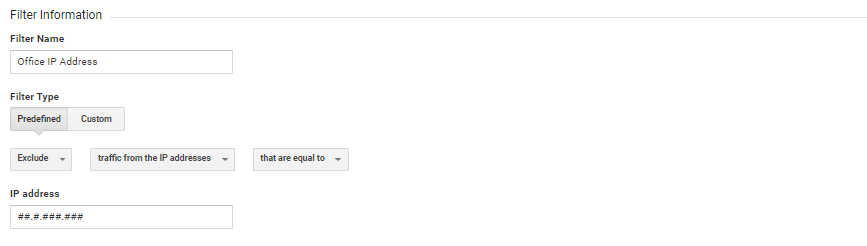
Universal Analytics has a section dedicated to filters, which include IP filters at the View level of properties. As Views do not exist in Google Analytics 4 the process has changed significantly.
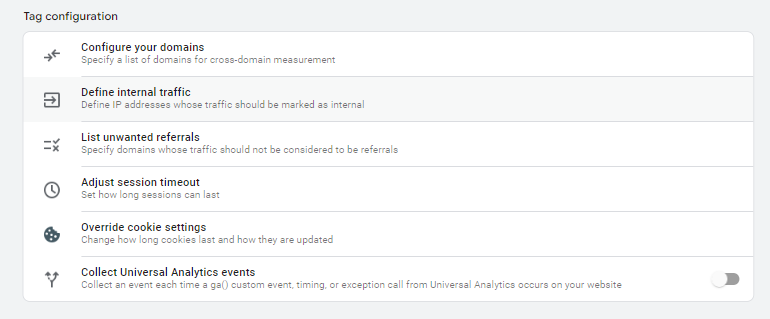
In Google Analytics 4 IP filters can be set up by accessing the Data Stream. This is the part of GA4 that sends all data from your website to Google Analytics 4 to populate your reports with information.
To begin setting up your IP filter, first navigate to Admin -> Property -> Data Stream. Select the stream for your website and scroll down to the Google Tag options and select “Configure Tag Settings”, followed by “Define Internal Traffic”.

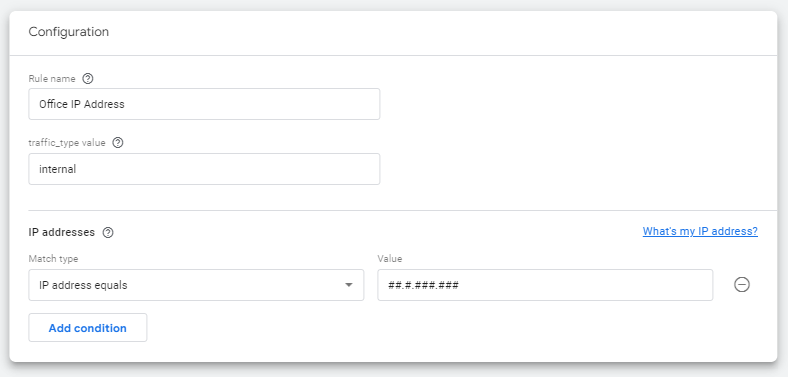
As we’re wanting to exclude traffic from employees and staff of the business itself, we can define any such traffic as “internal” and exclude it from reports. Within these settings there is an option to “Define Internal Traffic”, which will let us select an IP address (or range of addresses).
Once it’s defined all events will be tagged with the “traffic_type” event parameter with the value of “internal”. Bear in mind that every part of GA4 is considered an event. We have a blog post on GA4 events if you want to learn more about those!
Within the internal traffic options, we can decide what to assign as internal traffic by matching it to an IP address, or set of IP addresses if your business has its own network.
However defining internal traffic is not enough on its own to exclude the traffic from reports automatically. As all actions within Google Analytics 4 are treated as events with parameters, we need to tell GA4 what to do when it detects any events marked with the traffic type “internal”.
We can filter all kinds of traffic from reports using Data Filters. These are found at Admin -> Property -> Data Settings -> Data Filters.
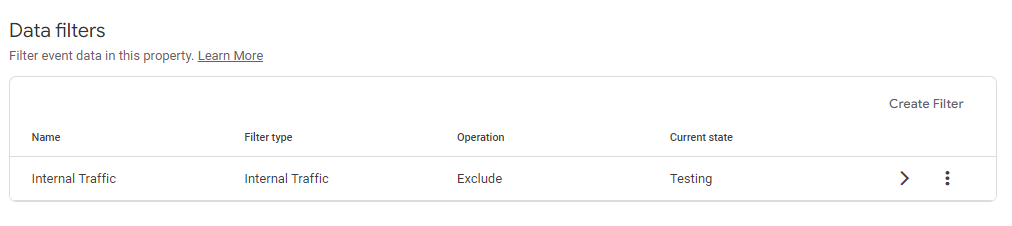
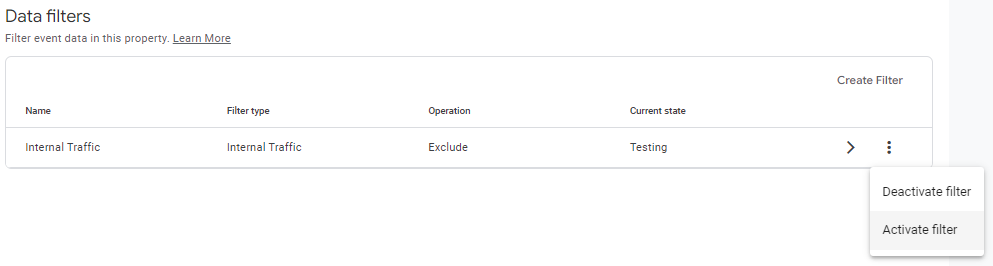
Internal is added by default, in what is known as testing mode. This means it wont be quite live yet, but is ready to be tested to make sure it works.
Testing Your IP Filter
GA recommends filters be tested first beforehand. Once active, any filtered data will be missing from your reports, and if the filter is set up incorrectly, you may lose data forever.
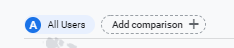
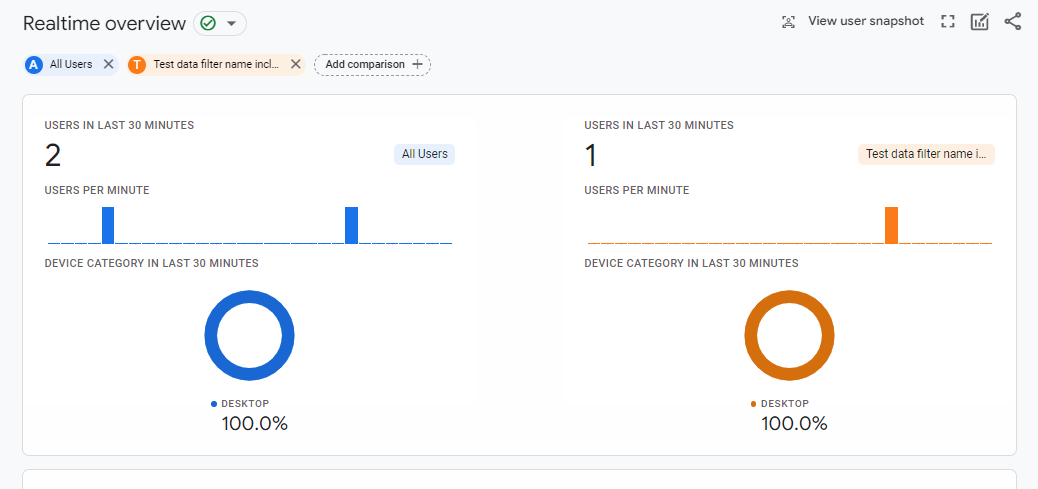
To test the IP filter, we would recommend using the real-time report and looking at what events are detected, by comparing all traffic with filtered traffic. To begin, open up the Google Analytics 4 real-time report, and add a new comparison to the report.
Google Analytics 4 does help when selecting what data to compare by providing a dimension called “Test data filter name”. As we have assigned our IP addresses to the Internal Traffic data filter, we can select this one as the dimension.
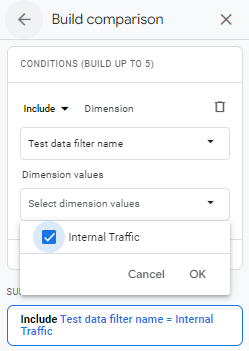
By adding a comparison with Internal Traffic, you will be able to see if the filter is working correctly by comparing it with real time traffic. All traffic will appear under “All Users” and only traffic you want to exclude should show up as “Internal Traffic”. By using a device connected via the IP address you want filtered, you should be able to see yourself as a user appear as Internal Traffic.
After testing, if the IP filter works as intended, then the filter can be updated to “Active” instead of “Testing” using the 3-dots or options via the arrow to enable the IP filter in Google Analytics 4 reports.
Once enabled, your GA4 property will automatically exclude any traffic from IP addresses listed in the filter. You will be able to browse, update and edit your own website without influencing the data that is used for reporting for a more accurate representation of your genuine website visitors.